

If you’ve ever bitten into soggy chicken strips, you know the disappointment. That’s why this recipe for extra crunchy panko chicken strips is a total game-changer. Whether you’re meal-prepping for the week or making a quick dinner for the family, this foolproof method delivers golden, crispy perfection every single time. With just the right combination of seasonings, a double-coating trick, and the magic of panko breadcrumbs, you’ll finally get that restaurant-style crunch without deep frying. In this article, I’ll walk you through the process, share pro tips, and answer the most asked questions on how to keep chicken strips ultra crispy.

Table of Contents
Table of Contents
Why These Extra Crunchy Chicken Strips Hit Home
A childhood craving that never left
Hi, I’m Emily. When I was growing up, crispy chicken strips were one of my ultimate comfort foods. Not the fast-food kind, but the homemade ones my grandma made with love and a whole lot of crunch. I remember sitting at the kitchen counter, watching her press each strip into breadcrumbs, whispering that the secret was in the “second dip.” She wasn’t wrong. Her chicken strips were always light, golden, and made that satisfying crunch when you bit into them.
Fast-forward to today, and that same nostalgic comfort inspired this extra crunchy panko chicken strips recipe. I’ve taken her old-school method and modernized it for busy kitchens keeping all the crispy magic without making a greasy mess. These strips aren’t just coated they’re layered in texture for maximum crunch.
Print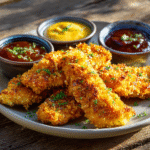
Extra Crunchy Panko Chicken Strips That Stay Crispy Every Time
- Total Time: 35 minutes
- Yield: 4 servings
Description
These extra crunchy panko chicken strips are golden, juicy, and packed with flavor. With a double coating and crispy texture, they’re the ultimate homemade comfort food perfect for dinner, lunchboxes, or game day.
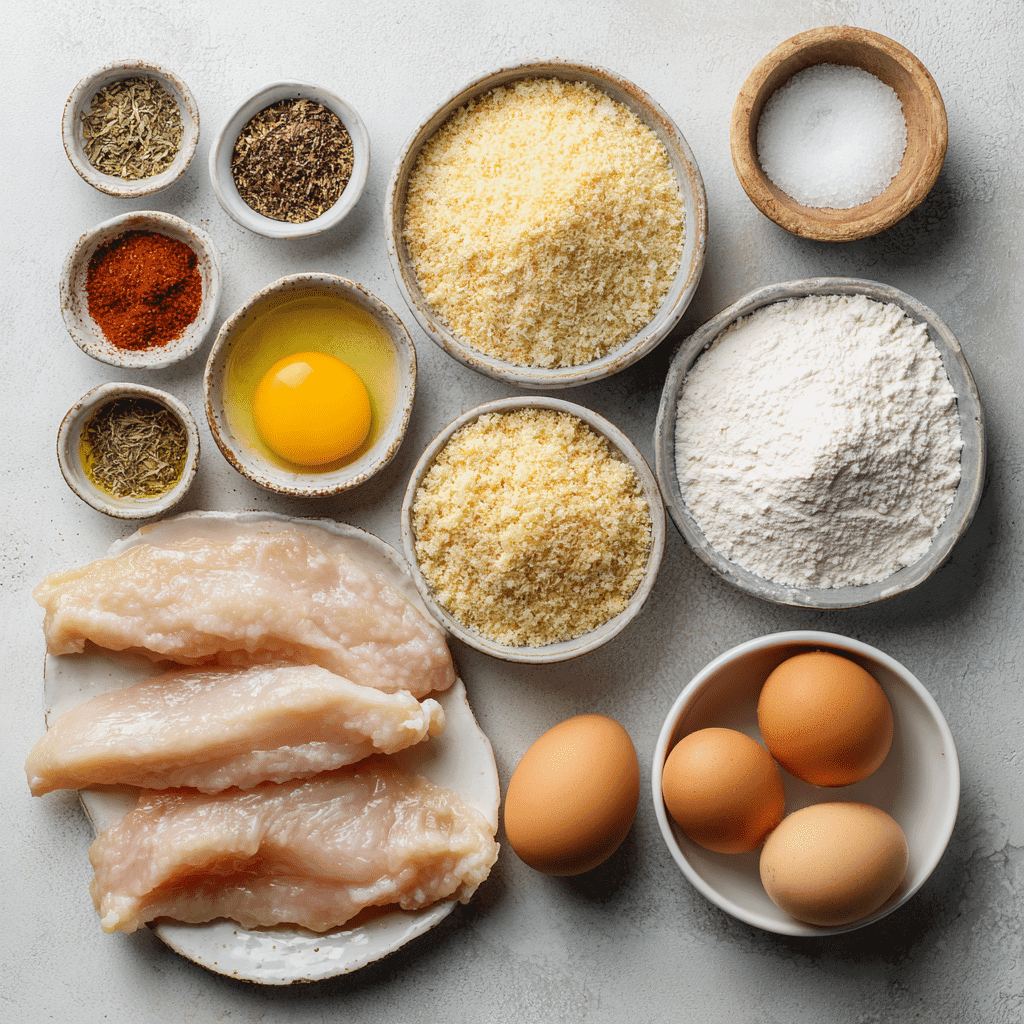
Ingredients
1.5 lbs chicken tenders or breast strips
1 cup all-purpose flour
1/2 cup cornstarch
1 tsp garlic powder
1 tsp smoked paprika
1 tsp salt
1/2 tsp black pepper
2 large eggs
2 tbsp milk
2 cups panko breadcrumbs
Neutral oil for frying or baking spray
Instructions
1. Pat chicken strips dry.
2. Mix flour, cornstarch, and seasonings in a shallow bowl.
3. In a second bowl, whisk eggs and milk.
4. Place panko in a third bowl (toast if desired).
5. Dredge each chicken strip in flour, then egg, then panko.
6. Repeat egg and panko for double coating.
7. Let coated strips rest 5–10 minutes on a wire rack.
8. Bake, air fry, or shallow fry at high heat until golden.
9. Let rest on a wire rack before serving.
10. Serve hot with dipping sauces or sides.
Notes
To freeze: bread strips, freeze on a tray, then store in a bag.
Reheat leftovers in an oven or air fryer for best crispiness.
Add Parmesan to panko for extra flavor.
Works great in wraps or salads too.
- Prep Time: 15 minutes
- Cook Time: 20 minutes
- Category: Main Dish
- Method: Baked or Fried
- Cuisine: American
What makes panko different and better
Panko breadcrumbs aren’t your average coating. Originating from Japan, they’re made from crustless bread that’s processed into large, airy flakes. That structure creates a superior crunch because the flakes brown evenly and don’t absorb as much oil as regular breadcrumbs. When paired with a few clever prep tricks, panko transforms simple chicken tenders into something truly next level.
If you’ve ever had a sad, soggy chicken strip, don’t worry we’re about to fix that for good. On FooodRecipes, we believe homemade meals should taste like a hug, and these panko strips do exactly that.
The Method How to Make Panko Chicken Strips Ultra Crispy
The double-dip technique that locks in the crunch
If you’re wondering how to make extra crunchy panko chicken strips that stay crispy long after cooking, the answer is all in the prep. The most effective method is the double-dip coating technique. First, dredge your chicken strips in a seasoned flour mix. Then, dip them into a bowl of beaten eggs with a splash of milk this helps the crumbs cling better. Now, coat the chicken in a generous layer of panko breadcrumbs.
Here’s where the magic happens: repeat the egg and panko step again. That second coat gives the chicken extra crunch, more structure, and helps it stay crisp whether baked, fried, or air-fried.
Panko’s light and airy texture gives it a major edge over traditional breadcrumbs. You can even toast the panko for a few minutes before coating your chicken it gives a beautiful golden color and an unbeatable crunch. It’s the same approach we use in our healthy baked chicken tenderloins, where crispiness meets clean eating.
Cooking methods that maximize crispiness
Once your strips are coated, it’s time to cook and you’ve got three winning options:
- Oven-Baked: Arrange on a wire rack set over a baking sheet. Bake at 425°F for 18–20 minutes. The wire rack allows hot air to circulate, so the bottoms don’t get soggy.
- Air Fried: Spray lightly with oil and air fry at 400°F for 10–12 minutes. Flip halfway for even browning.
- Pan Fried: Heat about ½ inch of oil in a skillet to 350°F. Fry each strip 3–4 minutes per side until deep golden brown.
For bonus crispiness, don’t crowd your pan or basket, and always let cooked chicken rest on a wire rack, not paper towels. This prevents steam from ruining that perfect crust.
Troubleshooting, Texture, and Panko Tips
Common mistakes that ruin your crunch
Even the best recipes can fall flat if a few details get missed. One of the most common issues with panko-coated chicken is sogginess usually caused by excess moisture or crowding during cooking. Before coating, make sure your chicken strips are thoroughly patted dry with paper towels. If you’re in a rush and skip this step, the coating won’t stick well, and moisture will steam the breadcrumbs instead of letting them crisp.
Another culprit? Not letting your coated chicken rest before cooking. Give it 5–10 minutes to set on a wire rack before frying or baking. This helps the coating adhere better and develop a crisper crust.
You also want to be generous but balanced with seasoning. Adding garlic powder, paprika, salt, and even a pinch of cayenne into the flour or panko mix makes all the difference. It’s the same trick we use in our ultra-flavorful lazy day chicken tacos simple but never boring.
Next-level texture tips for pro-level strips
For advanced crunch lovers, here are a few smart upgrades:
- Use cornstarch in the initial dredge along with flour. It creates a lighter, crispier texture.
- Mix in crushed cornflakes or potato chips with your panko for extra texture and flavor.
- Add Parmesan cheese into the panko for richness and a nutty, toasted edge.
Want to reheat leftovers without losing that crunch? Skip the microwave and use a 400°F oven or air fryer for 5–7 minutes. They’ll come out just as crispy as day one.
These panko chicken strips are a regular in my kitchen, right next to comfort classics like million dollar chicken crockpot pasta and our reader-favorite slow cooker creamy chicken soup. Easy, satisfying, and totally addictive.
Serving, Storing & Variations
How to serve extra crunchy panko chicken strips
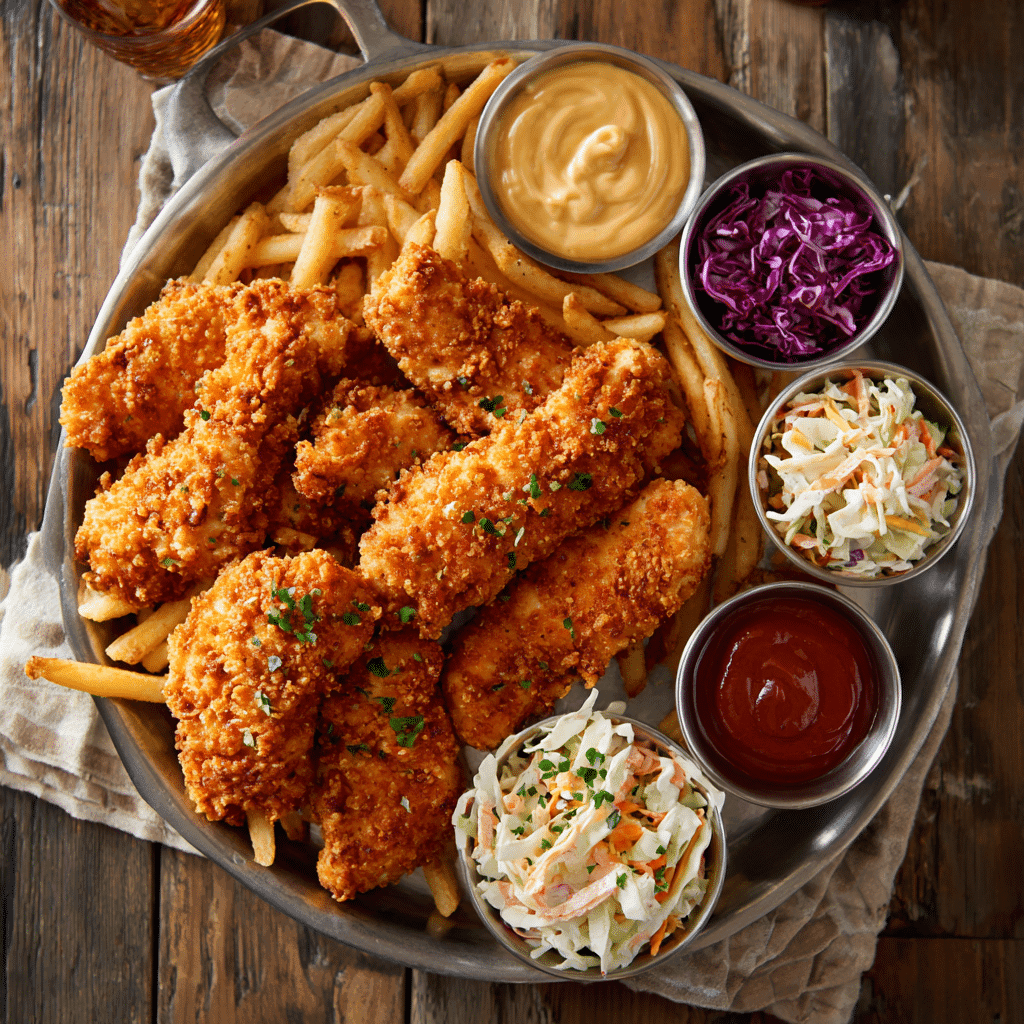
These extra crunchy panko chicken strips are versatile enough to star in weeknight dinners or party platters. For a classic combo, serve them with honey mustard, ranch, or homemade sriracha mayo. Want to take it up a notch? Layer them into sandwiches, slice over salads, or wrap them into tortillas for a crispy chicken wrap.
They’re also a hit with sides like garlic roasted potatoes, coleslaw, or baked mac and cheese. The texture is so addictive that they can easily replace fried chicken in your favorite meals. If you enjoy savory, comforting flavors, these strips pair beautifully with creamy garlic chicken with spinach or even a warm chicken and cabbage skillet.
How to store and reheat for max crispiness
These strips are best enjoyed fresh, but leftovers reheat surprisingly well. Store them in an airtight container in the fridge for up to 3 days. To reheat, use an oven or air fryer at 375°F for 5–7 minutes. Avoid microwaving, which softens the panko coating and ruins the crunch.
You can also freeze the uncooked breaded chicken strips for up to 2 months. Just flash-freeze them on a baking sheet, then transfer to a freezer bag. When ready to cook, bake or air fry directly from frozen no thawing required.
For a twist, try tossing the strips in sauces after cooking think buffalo, garlic parmesan, or sweet chili. If you’re after another satisfying dinner with bold flavor, don’t miss the chicken bacon ranch pasta or our hearty creamy garlic chicken skillet.
With the right prep and tips, you’ll be turning out golden, crispy chicken strips that rival any restaurant’s right from your own kitchen.
for more recipes follow me in pinterest
Conclusion
Crunchy, golden, and packed with flavor, these extra crunchy panko chicken strips are everything a homemade meal should be quick, easy, and unbelievably satisfying. Whether you serve them fresh with dipping sauce, stuffed in sandwiches, or saved for next-day lunch, these strips always deliver.
Thanks to a few clever prep tips and the power of panko, you can skip the takeout and still get that crave-worthy crunch right at home. If this recipe brought a little joy to your kitchen, don’t forget to try more comfort-packed meals like our lazy day chicken tacos or creamy, dreamy slow cooker chicken soup.
Homemade really is better especially when it crunches.